Benq MP522 User Manual Page 30
- Page / 59
- Table of contents
- TROUBLESHOOTING
- BOOKMARKS
- MP512/MP513/MP522 1
- Digital Projector 1
- User Manual 1
- Table of contents 2
- Important safety instructions 3
- (10000 feet) 5
- (0 feet) 5
- Introduction 7
- Shipping contents 8
- Projector exterior view 9
- Controls and functions 10
- Remote control 11
- Positioning your projector 13
- plane of the projector 14
- 4:3 aspect image in a 4:3 14
- MP512 projection dimensions 17
- Connection 18
- Connecting a monitor 19
- Best video quality 20
- Better video quality 20
- Least video quality 20
- Operation 24
- Using the menus 25
- BackMENU 26
- Please try again 26
- Customer Center 27
- Recall code: 27
- ExitMENU 27
- Switching input signal 28
- Adjusting the projected image 28
- Auto-adjusting the image 29
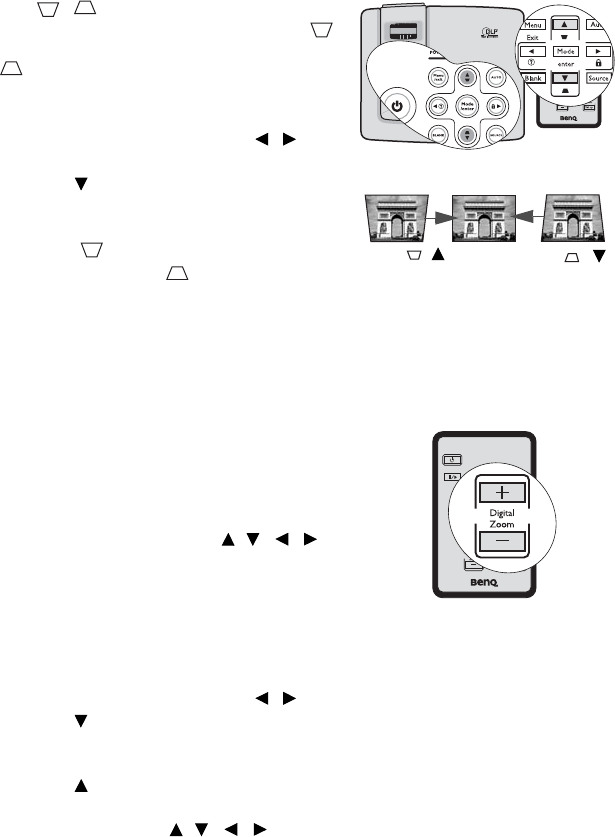
- Correcting keystone 30
- Selecting the aspect ratio 31
- Optimizing the image 32
- Using Wall Color 33
- *About color temperatures: 34
- Presentation Timer 36
- Hiding the image 37
- Locking control keys 37
- Freezing the image 38
- Utilizing FAQ function 38
- Shutting down the projector 39
- Menu operation 40
- Operation 41 41
- Description of each menu 42
- FUNCTION 44
- Menu display time (15 sec) 44
- Menu position (Center) 44
- Maintenance 47
- Lamp information 48
- Timing of replacing the lamp 49
- Replacing the lamp 50
- Resetting the lamp timer 52
- Indicators 53
- Troubleshooting 54
- Specifications 55
- Dimensions 56
- Timing chart 56
- Limited warranty 58
- Copyright 58
- Disclaimer 58
- Regulation statements 59
Related products and manuals for Projectors Benq MP522
 (1 pages)
(47 pages)
(56 pages)
(34 pages)
(53 pages)
(44 pages)
(35 pages)
(55 pages)
(56 pages)
(62 pages)
(47 pages)
(34 pages)
(44 pages)
(37 pages)
(61 pages)
(55 pages)
(48 pages)
(1 pages)
(66 pages)
(1 pages)
(47 pages)
(56 pages)
(34 pages)
(53 pages)
(44 pages)
(35 pages)
(55 pages)
(56 pages)
(62 pages)
(47 pages)
(34 pages)
(44 pages)
(37 pages)
(61 pages)
(55 pages)
(48 pages)
(1 pages)
(66 pages)
© 2020, manymanuals.com. All rights reserved. | 1.577 s |
 Manymanuals.com
 Manymanuals.de
 Manymanuals.fr
 Manymanuals.it
 Manymanuals.pl
 Manymanuals.cz
 Manymanuals.es
 Manymanuals-pt.com
Comments to this Manuals